[Tutorial] Turn An Old PC to Home Media Server
I am coming to you today with a different type of content. I have never posted anything about technology before. But, I am sharing a tutorial for those who have a really old PC that they are not using. They can turn it to a Home Media Server.
First, we need to tackle the fact that installing any recent operating system will make your old PC or laptop really slow. So, I have selected for you a really small Linux Distribution to install as an operating system and this shall not take much of your device resources.
I'll go ahead with the steps now:
- Download MX Linux
https://mxlinux.org/download-links/
Once you are done. Burn it on a USB and then install it on your device.
- Open terminal
Press CTRL + ALT + T to open a terminal
- Update the package list by running the below code
sudo apt update
it will ask you for the password of the super user. The default is "root" without brackets, unless you've changed it.
After you are done with all of the above steps, we will need to install Jellyfin. This is their installation guide: https://jellyfin.org/docs/general/installation/linux I will explain it below as well.
- Open terminal again if you haven't done that already and Install curl and gnupg through running the below command:
sudo apt install curl gnupg
- Enable Universe Repo
sudo add-apt-repository universe
In case it fails, you can achieve the same results with the below command.
sudo apt-get install software-properties-common
- Download the GPG signing key
sudo mkdir -p /etc/apt/keyrings
curl -fsSL https://repo.jellyfin.org/jellyfin_team.gpg.key | sudo gpg --dearmor -o /etc/apt/keyrings/jellyfin.gpg
- Again, update the packages
sudo apt update
- Install Jellyfin
sudo apt install jellyfin
- Start Jellyfin
sudo systemctl start jellyfin
Now, you have installed the server.
Open a web browser from another device to use Jellyfin. Here is the address:
http://[Jellyfin_Server_IP]:8096
These are the default credentials for admin:
Username: admin
Password: admin
If it didn't work. Try not entering a password. It shall work.
Once you are done, you have created your media server. Now, we can start adding the folders to Jellyfin which includes our movies.
Go to your browser which you've opened Jellyfin from.
Go to Admin then, Dashboard.
On your left hand side, you'll find a menu, go to Server then, Libraries.
Click on "Add Media Library".
Choose the folders and add them.
Your Jellyfin will sync your movies and TV shows similar to Netflix.
Note, put your movies in a separate folder from your TV shows to have a better organization of your media.
Troubleshooting:
In case, Jellyfin is not able to see your folders. Follow the below steps:
Open terminal on your old PC.
Navigate to your folder:
cd /path/to/your/folder
- Check the permission of the folder:
ls -l
- Change the permission:
sudo chmod -R u+rwx /path/to/your/folder
- Recheck if the permissions have changed:
ls -l
Now, go back to Jellyfin and click on "Add Media Library". If the folders are still not showing, you need to restart Jellyfin by writing the below commands in the terminal of your old PC.
- Stop Jellyfin
sudo systemctl stop jellyfin
Give it a minute or two to stop. Or, just restart your device.
Then, start Jellyfin
sudo systemctl start jellyfin
Note: every time your router changes the IP address of your old PC, you will have to enter the new IP Address. So, you can solve this by giving your old PC a Static IP Address. Just write your router model in Google and next to it Static IP Address and you'll get the steps to do that (they are really short). Or, you can ask AI for help with that.
Another note: on Jellyfin, you can go to Admin Dashboard and add users.
Golden tip: Disable transcoding!.. Your laptop will try to transcode your videos and that takes a lot of resources. An old device may not be able to handle that. You can do this by following the below steps:
Login to your admin user account.
Go to Settings
Go to Playback Settings
Disable Transcoding
Save Changes.
Lastly, you can install the Jellyfin on your Android and IOS devices to watch your movies and TV shows.
I wrote this guide as a help to those who have old unused devices and they are looking to make a use of it.
Posted Using InLeo Alpha
Nice one! I think I need to try this!
!BBH !hiqvote
Indeed! It is really easy to do. If you've newer device, you can install Ubuntu on it and do that.
I have kids cartoons on it of my selection for the kids in the house as well as old shows.
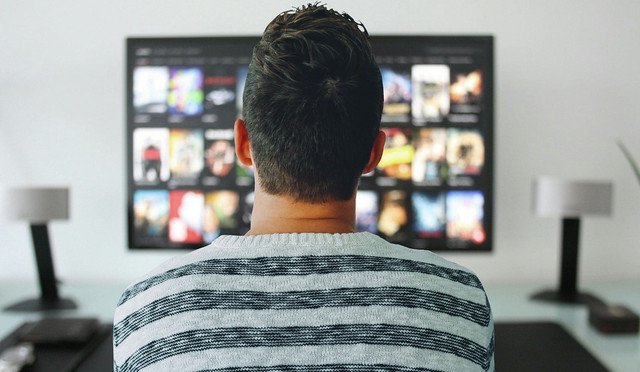
You can have something similar to this image: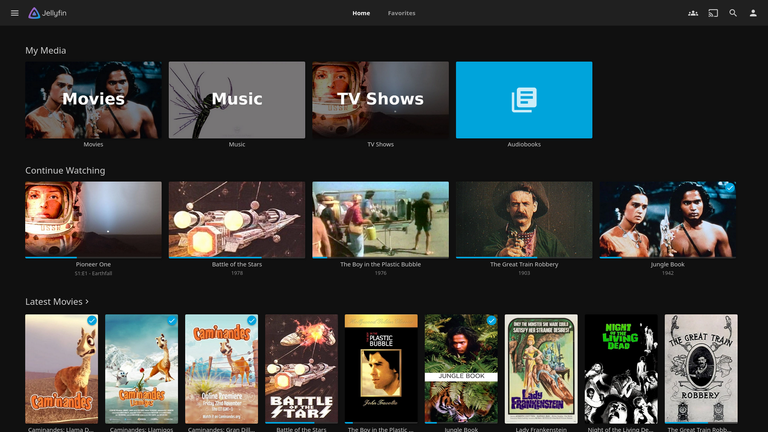
That is just awesome! I think I need this in my life. Have a whole damn library on a 3TB external harddrive 😁
If you're having Android TVs, you will find Jellyfin app on them.
Btw, I forgot to mention the below in the post. In the Settings menu you can choose the player. You can choose, external app and have your movies play from your favorite media player.
Plus, I put the link of the official pages, just incase I didn't explain something well.
I tried this on a laptop that is older than 2010 for testing purposes and it worked like a charm.
@ronnie10! @caspermoeller89 likes your content! so I just sent 1 BBH to your account on behalf of @caspermoeller89. (5/20)
(html comment removed: )
)
@caspermoeller89, the HiQ Smart Bot has recognized your request (1/3) and will start the voting trail.
In addition, @ronnie10 gets !PIZZA from @hiq.redaktion.
For further questions, check out https://hiq-hive.com or join our Discord. And don't forget to vote HiQs fucking Witness! 😻
$PIZZA slices delivered:
@hiq.smartbot(1/5) tipped @ronnie10